Remember what I said the other day, about sometimes googling the 'world's best' and the name of whatever food item I want a recipe for? Well, I did it again. And it worked, again. Marvelously.
We are heading fast into fall weather (ok, so maybe it'll start getting cold this weekend, after it hits 80 degrees tomorrow) and I have been on the hunt for a nice vegetable broth to mix in to my rotation of chicken soup and beef stew. Sometimes you just need to feed a vegan friend some good home cookin, you know? Or maybe you're a hardcore carnivore (raises hand) and have a healthy appreciation for the way your body feels and your jeans fit when you eat more veggies. That's where I'm at right now, the tight jeans stage. Back to the broth...
My favorite soups or broths are the ones that have a decent bit of oomph to them, something that gives them some staying power, or makes it feel like you've consumed more then hot water. Turns out there is a name for this! It's called umami.
Umami is a Japanese word that means 'pleasant savory taste,' and it is imparted by something called glutamate, which is a type of amino acid, and ribonucleotides, which is a word I never thought I'd need to spell again after high school/college. Long story short, umami is something that is very important in making yummy food yummy, and you can base a recipe off things that are high in glutamates and ribonucleotides and make yourself some very yummy food. You can even pick out specific vegan/vegetarian items that are high in glutamates/ribonucleotides like tomatoes, dried shiitake mushrooms, marmite, and kombu/dashi seaweed.
There's a lot of in depth information on the web about glutamates, so google it if you want to learn more, as I am moving on to the in depth portion of broth making. I based my recipe on the one found here, which also contains a much better explanation, but I also tweaked that recipe to match what I had in the house or was willing to purchase. The original recipe calls for marmite (Amazon affiliate link!), which I didn't have, but would definitely try sometime if I came across it at the store. Or on Amazon, duh.
Amy's Delicious Vegetable Broth
vegetable oil or butter
2c roughly chopped onion
1c roughly chopped carrot
1/3c chopped celery leaves (or celery itself)
2 cloves minced garlic (don't you dare use the stuff from a jar)
1 regular sized container button/white mushrooms, washed, roughly chopped
1 star anise (buy it once, own it forever!)
1 teaspoon salt
10 whole peppercorns
4-5 bay leaves
1/2 can tomato paste
3-4 fresh parsley leaves and stems, roughly chopped
1 embarrassingly small piece of fresh rosemary (mine was maybe 3", maybe)
2"x3" piece of kombu (dried seaweed)
7 cups water
Directions:
-Use the oil or butter to carmelize the onion, carrot, and celery (only if using actually celery, don't try to carmelize the leaves, that'd be silly) in your soup pot
-Deglaze the pan with the liquor of your choice (original recipe calls for dry vermouth, I used water because I'm lame and don't have vermouth).
-Add in the remaining ingredients, bring to a boil, then take down to a simmer.
-Simmer until broth is reduced to the desired intensity (I reduced mine by half, but be forewarned that you won't get a giant vat of broth if you do that).
-Strain the broth, then consume, or use to make other delicious stuff like vegetable soup.
Other notes:
-The original recipe recommends making this in a pressure cooker, see link. I don't have one, so I did it in a stock pot to no ill effect.
-If you quadruple this recipe, it's entirely possible that you might be able to take over the world
-This doesn't taste like anise/black licorice. I promise. Pinky swear. Seriously, just try it.
Let me know if you try this broth recipe! It's one of the most adventurous broth recipes I've ever made, but the results were well worth the off the beaten path ingredients!
Wednesday, October 1, 2014

Tuesday, September 23, 2014
World's Best Chocolate Chip Cookies
Sometimes I like to google "World's Best" and then insert the name of whatever recipe I happen to be on the hunt for. I've been fairly successful with it. One of the best successes was when I googled "World's Best Chocolate Chip Cookies." O.M.G. did I ever find the quintessential recipe!! I made these for my boyfriend's birthday, which is why an average chocolate chip cookie just would not do. It had to be special for my special guy.
The recipe I found was published in the New York Times, and was adapted from a Jacques Torres recipe. I also googled Jacques Torres, of course. He is a master pastry chef known as Mr. Chocolate. Well, that certainly explains a lot about why this recipe is so delicious!
The recipe itself is fairly straightforward. You cream together butter and sugar (lots of sugar!), then mix in flour and chocolate chips. 10 oz. of light brown sugar! Plus white sugar after this!
 Here is a picture of the ingredients I assembled for this project:
 And here is the recipe.
World's Best Chocolate Chip Cookies
2 cups minus 2 tablespoons
(8 1/2 ounces) cake flour
1 2/3 cups (8 1/2 ounces) bread flour
1 1/4 teaspoons baking soda
1 1/2 teaspoons baking powder
1 1/2 teaspoons coarse salt
2 1/2 sticks (1 1/4 cups) unsalted butter
1 1/4 cups (10 ounces) light brown sugar
1 cup plus 2 tablespoons (8 ounces) granulated sugar
2 large eggs
2 teaspoons natural vanilla extract
1 1/4 pounds bittersweet chocolate disks or fèves, at least 60 percent cacao content (see note)
Sea salt.
Directions:
1. Sift flours, baking soda, baking powder and salt into a bowl. Set aside.
2. Using a mixer fitted with paddle attachment, cream butter and sugars together until very light, about 5 minutes. Add eggs, one at a time, mixing well after each addition. Stir in the vanilla. Reduce speed to low, add dry ingredients and mix until just combined, 5 to 10 seconds. Drop chocolate pieces in and incorporate them without breaking them. Press plastic wrap against dough and refrigerate for 24 to 36 hours. Dough may be used in batches, and can be refrigerated for up to 72 hours.
3. When ready to bake, preheat oven to 350 degrees. Line a baking sheet with parchment paper or a nonstick baking mat. Set aside.
4. Scoop 6 3 1/2-ounce mounds of dough (the size of generous golf balls) onto baking sheet, making sure to turn horizontally any chocolate pieces that are poking up; it will make for a more attractive cookie. Sprinkle lightly with sea salt and bake until golden brown but still soft, 18 to 20 minutes. Transfer sheet to a wire rack for 10 minutes, then slip cookies onto another rack to cool a bit more. Repeat with remaining dough, or reserve dough, refrigerated, for baking remaining batches the next day. Eat warm, with a big napkin.
Yield: 1 1/2 dozen 5-inch cookies.
Take a look at that delicious yummy goodness!!! I upped the ante on my batch by adding some walnuts to the cookies because that's the way my boyfriend likes them, but you could leave out the nuts or add whatever kind you wanted.
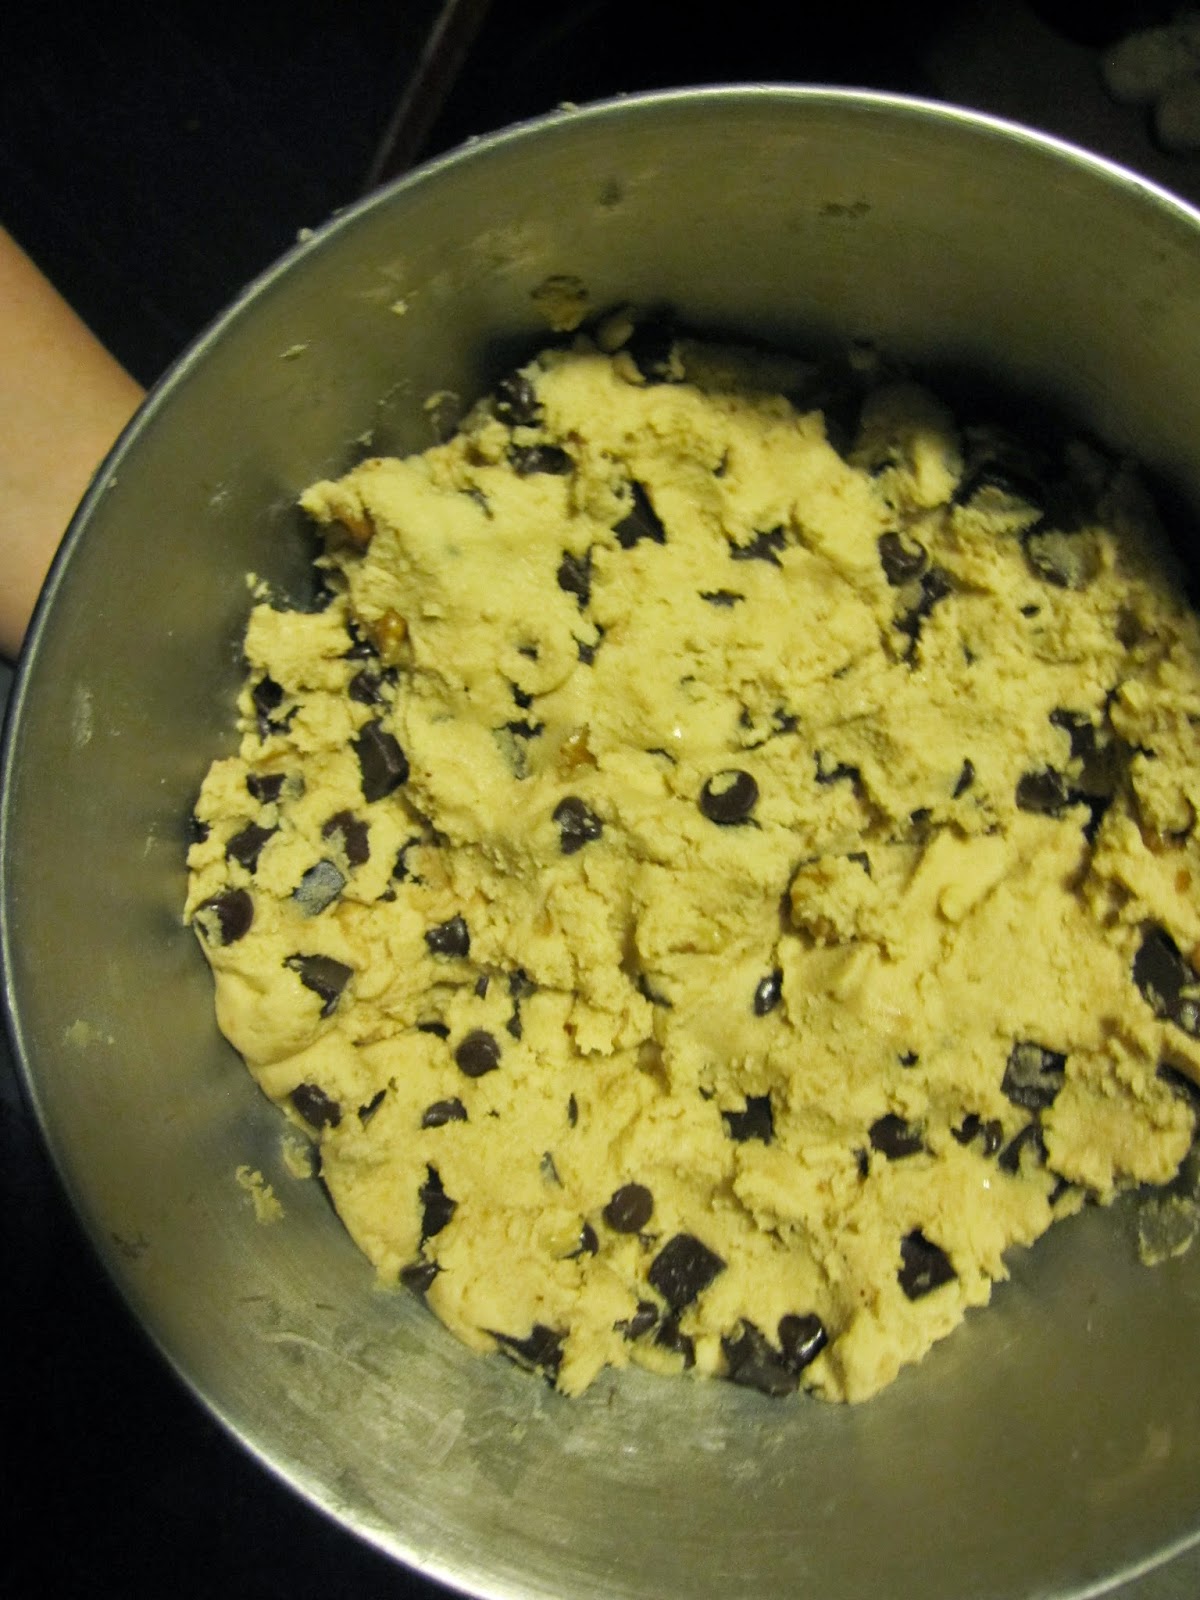
 Here's a look at my other batch, without nuts, after it's been all mixed up. I ran out of the one kind of chocolate chips and had to add another kind, so you might notice that there is more then one shape of chocolate in my dough!
 The chocolate chips I used were Ghirardelli Chocolate Premium Baking Chips 60% Cacao Bittersweet Chocolate. Click here to buy through my Amazon affiliate link, or you can get them at Krogers.
 My advice? You should really listen to the recipe when it says to refrigerate the dough for at least 24 hours. For some reason it makes a huge difference.
If you're interested in science and the reason these cookies are the world's best, then you should read the study put together by Serious Eats Food Lab. They did a lengthy inquest to determine what aspects of cookies lend themselves to what qualities. You can find that article here.
The end result of this recipe is a large, delicious cookie with the right balance of delicious chocolate and salt. They are fabulous hot out of the oven, or at room temperature. And they are even better if you dip them in milk. yum yum! Let me know if you give this recipe a try!

The recipe I found was published in the New York Times, and was adapted from a Jacques Torres recipe. I also googled Jacques Torres, of course. He is a master pastry chef known as Mr. Chocolate. Well, that certainly explains a lot about why this recipe is so delicious!
The recipe itself is fairly straightforward. You cream together butter and sugar (lots of sugar!), then mix in flour and chocolate chips. 10 oz. of light brown sugar! Plus white sugar after this!
World's Best Chocolate Chip Cookies
2 cups minus 2 tablespoons
(8 1/2 ounces) cake flour
1 2/3 cups (8 1/2 ounces) bread flour
1 1/4 teaspoons baking soda
1 1/2 teaspoons baking powder
1 1/2 teaspoons coarse salt
2 1/2 sticks (1 1/4 cups) unsalted butter
1 1/4 cups (10 ounces) light brown sugar
1 cup plus 2 tablespoons (8 ounces) granulated sugar
2 large eggs
2 teaspoons natural vanilla extract
1 1/4 pounds bittersweet chocolate disks or fèves, at least 60 percent cacao content (see note)
Sea salt.
Directions:
1. Sift flours, baking soda, baking powder and salt into a bowl. Set aside.
2. Using a mixer fitted with paddle attachment, cream butter and sugars together until very light, about 5 minutes. Add eggs, one at a time, mixing well after each addition. Stir in the vanilla. Reduce speed to low, add dry ingredients and mix until just combined, 5 to 10 seconds. Drop chocolate pieces in and incorporate them without breaking them. Press plastic wrap against dough and refrigerate for 24 to 36 hours. Dough may be used in batches, and can be refrigerated for up to 72 hours.
3. When ready to bake, preheat oven to 350 degrees. Line a baking sheet with parchment paper or a nonstick baking mat. Set aside.
4. Scoop 6 3 1/2-ounce mounds of dough (the size of generous golf balls) onto baking sheet, making sure to turn horizontally any chocolate pieces that are poking up; it will make for a more attractive cookie. Sprinkle lightly with sea salt and bake until golden brown but still soft, 18 to 20 minutes. Transfer sheet to a wire rack for 10 minutes, then slip cookies onto another rack to cool a bit more. Repeat with remaining dough, or reserve dough, refrigerated, for baking remaining batches the next day. Eat warm, with a big napkin.
Yield: 1 1/2 dozen 5-inch cookies.
Take a look at that delicious yummy goodness!!! I upped the ante on my batch by adding some walnuts to the cookies because that's the way my boyfriend likes them, but you could leave out the nuts or add whatever kind you wanted.
If you're interested in science and the reason these cookies are the world's best, then you should read the study put together by Serious Eats Food Lab. They did a lengthy inquest to determine what aspects of cookies lend themselves to what qualities. You can find that article here.
The end result of this recipe is a large, delicious cookie with the right balance of delicious chocolate and salt. They are fabulous hot out of the oven, or at room temperature. And they are even better if you dip them in milk. yum yum! Let me know if you give this recipe a try!
Saturday, September 20, 2014
Cooking Classes at The Learning Kitchen
What should I do with my life? I've been working on answering this question for a while, although I don't know that I'll ever fully answer it. One of the first things I decided to do was to explore cooking a little more. I do have a food blog, after all. What if culinary school is where my path should lead? How do I know if I enjoy receiving formal instruction in cooking?
I haven't had formal instruction in cooking since my days in the after school program at North Avondale Montessori. I still remember how to wipe the cupcake pan after you fill it with batter, but before baking, so you have an easier time cleaning the pan when you are done!
There are a lot of local options for cooking classes, but the place that appealed to my taste buds the most was The Learning Kitchen in West Chester. I chose them because of the following criteria:
-Each student gets their own cook top (hands on!)
-They offered a knife skills class (my area of most interest)
-Wide variety of options for other classes
-Fit my schedule
-Reasonable price (~$65+ typically, but they were running a Facebook special when I found them, so I think I paid something around $55 or so)
I took 3 classes:
Hone Your Knife Skills
Beef: Season, Sear, Saute
Stuffed and Filled
Here is a picture of me cheese-ing it up before class. They provide you with an apron to wear, which is excellent as I was coming straight from work.

Of the 3 classes I took, Hone Your Knife Skills was by and far my favorite. It was taught by one of the owners, Jennifer Vogel, who shared a story about how she found herself in culinary school after realizing that she was quite skilled at chopping vegetables. In this class, they allowed us to try a number of different knife brands and sizes (20% discount if you buy on the day of your class!), and showed us how to properly hold and care for nice knives. We then learned how to chop, dice, julienne, etc as we each prepared our own panzanilla bread salad.


I had a really good time at the first class and have really been enjoying showing my boyfriend how well I can chop onions ever since! So I signed up for another class. Beef! I really love beef (and pork, let's be real here)! We made New York Strip with Maple Mustard Glaze and Bourbon Sauce, Pan-Roasted Flat Iron Steak with Chevre Chive Sauce, and Creole Sliders with Pineapple Pepper Sauce. This one was taught by one of the chef's that also teaches in the culinary program at Cincinnati State! She also does some private chef work on the side, and I'd seen an instructional video that she made for how to spatchcock and roast a whole chicken.
At the Beef class I was delighted to discover that The Learning Kitchen sells wine by the glass/bottle. Apparently they offer wine at all of the classes where the focus isn't on knife skills (for obvious reasons!!). I had some nice red wine while we were cooking, and then with my meal as well.
This was a pretty big meal, and the license The Learning Kitchen has doesn't allow for you to take home your leftovers, so come hungry (or stash a super secret sandwich bag in your purse)!


The third class I took was called Stuffed and Filled. We made Cheese and Sweet Pepper Stuffed Poblano Peppers, Pork Tenderloin with Prosciutto and Gouda, and Lemon Thyme Goat Cheese in Puff Pastry. The instructor also made us a little dessert with the leftover Puff Pastry, by filling it with some Sweetened Mascarpone!
*I had a little trouble with my Poblano, so it wasn't quite stuffed and filled, but more like a platform for conveying a delicious blend of cheese and sweet pepper. Hey, nobody's perfect!


 What a delicious meal! I thoroughly enjoyed learning to cook using the techniques taught in each of these classes.
Are these classes right for you?
The classes are very novice friendly, and they teach a lot of techniques that you can use for all kinds of kitchen tasks. As a more advanced cook, the class moved somewhat slowly at times, but I was happy to fill the gaps with a sip or two of wine as less experienced classmates got caught up. There was a good mix of people like me who wanted to learn more cooking skills in general, people that had been gifted a class by a friend/relative, and people that were doing it as a fun activity to enjoy together.
The Learning Kitchen offers several date night classes where couples can prepare a meal together, which I think would make for an excellent date (sushi! Indian, shrimp and filet! homemade ravioli!), especially since they have wine.
If you want to join me, the next class I want to take is The Five Master Skills, which are: using salt, heat management, simple sauces, tools, and proper ingredients. Who's coming with?
So, what should I do with my life? Cooking classes are fun. I might even be interested in teaching them, and I'd certainly be willing to take a couple more. What I learned from this experience is that I don't necessarily want to go to culinary school.
*The opinions contained within this blog post are my own, I was not paid for this post. I think The Learning Kitchen has offered some sort of discount if you share about them on your blog or rate them of Facebook etc, but I can't recall the details.
I haven't had formal instruction in cooking since my days in the after school program at North Avondale Montessori. I still remember how to wipe the cupcake pan after you fill it with batter, but before baking, so you have an easier time cleaning the pan when you are done!
There are a lot of local options for cooking classes, but the place that appealed to my taste buds the most was The Learning Kitchen in West Chester. I chose them because of the following criteria:
-Each student gets their own cook top (hands on!)
-They offered a knife skills class (my area of most interest)
-Wide variety of options for other classes
-Fit my schedule
-Reasonable price (~$65+ typically, but they were running a Facebook special when I found them, so I think I paid something around $55 or so)
I took 3 classes:
Hone Your Knife Skills
Beef: Season, Sear, Saute
Stuffed and Filled
Here is a picture of me cheese-ing it up before class. They provide you with an apron to wear, which is excellent as I was coming straight from work.
Of the 3 classes I took, Hone Your Knife Skills was by and far my favorite. It was taught by one of the owners, Jennifer Vogel, who shared a story about how she found herself in culinary school after realizing that she was quite skilled at chopping vegetables. In this class, they allowed us to try a number of different knife brands and sizes (20% discount if you buy on the day of your class!), and showed us how to properly hold and care for nice knives. We then learned how to chop, dice, julienne, etc as we each prepared our own panzanilla bread salad.
I had a really good time at the first class and have really been enjoying showing my boyfriend how well I can chop onions ever since! So I signed up for another class. Beef! I really love beef (and pork, let's be real here)! We made New York Strip with Maple Mustard Glaze and Bourbon Sauce, Pan-Roasted Flat Iron Steak with Chevre Chive Sauce, and Creole Sliders with Pineapple Pepper Sauce. This one was taught by one of the chef's that also teaches in the culinary program at Cincinnati State! She also does some private chef work on the side, and I'd seen an instructional video that she made for how to spatchcock and roast a whole chicken.
At the Beef class I was delighted to discover that The Learning Kitchen sells wine by the glass/bottle. Apparently they offer wine at all of the classes where the focus isn't on knife skills (for obvious reasons!!). I had some nice red wine while we were cooking, and then with my meal as well.
This was a pretty big meal, and the license The Learning Kitchen has doesn't allow for you to take home your leftovers, so come hungry (or stash a super secret sandwich bag in your purse)!
The third class I took was called Stuffed and Filled. We made Cheese and Sweet Pepper Stuffed Poblano Peppers, Pork Tenderloin with Prosciutto and Gouda, and Lemon Thyme Goat Cheese in Puff Pastry. The instructor also made us a little dessert with the leftover Puff Pastry, by filling it with some Sweetened Mascarpone!
*I had a little trouble with my Poblano, so it wasn't quite stuffed and filled, but more like a platform for conveying a delicious blend of cheese and sweet pepper. Hey, nobody's perfect!
Are these classes right for you?
The classes are very novice friendly, and they teach a lot of techniques that you can use for all kinds of kitchen tasks. As a more advanced cook, the class moved somewhat slowly at times, but I was happy to fill the gaps with a sip or two of wine as less experienced classmates got caught up. There was a good mix of people like me who wanted to learn more cooking skills in general, people that had been gifted a class by a friend/relative, and people that were doing it as a fun activity to enjoy together.
The Learning Kitchen offers several date night classes where couples can prepare a meal together, which I think would make for an excellent date (sushi! Indian, shrimp and filet! homemade ravioli!), especially since they have wine.
If you want to join me, the next class I want to take is The Five Master Skills, which are: using salt, heat management, simple sauces, tools, and proper ingredients. Who's coming with?
So, what should I do with my life? Cooking classes are fun. I might even be interested in teaching them, and I'd certainly be willing to take a couple more. What I learned from this experience is that I don't necessarily want to go to culinary school.
*The opinions contained within this blog post are my own, I was not paid for this post. I think The Learning Kitchen has offered some sort of discount if you share about them on your blog or rate them of Facebook etc, but I can't recall the details.
Friday, March 28, 2014
Chocolate Covered Strawberry Chocolate Cake
I'm very active on social media. As I post more and more cake photos, friends and family have started sharing some viral cake photos and things from Pinterest with me. One friend jokingly shared the cake pictured below and asked if I'd make it for her birthday.
 That cake is big enough to serve several hundred people, at least. But it sure is a beauty, isn't it! And those strawberries are really quite tempting.
 No, that's not a mirrored picture. I'm just that discombobulated. Eventually I figured out how to fix it up though. Glad it was just on frosting and not fondant or I would have had to pull off the fondant and start again!

 These were so delicious that I made a few extra in case some of them 'went missing.'


I decided to make a smaller version of the cake (i.e. an 8" three layer cake) to help her celebrate her birthday. I chose a classic chocolate cake recipe from one of my favorite cookbooks, and whipped up a batch of fudgey frosting, plus some vanilla buttercream to do some writing.
But, you see, I really suck at writing with frosting on cakes. Seriously, I'm really bad at it. But I need to get better, and practice makes perfect.
In the meantime, I bought the Cake Boss Letter and Alphabet Fondant Stamp Kit. It looks fairly intuitive. You figure out why you want to say, and then you slide the letters into the holder and press it against the cake.

At least it would seem intuitive.
At least it would seem intuitive.
Once I figured out the right direction for the stamps, I just filled in the indentation with some frosting in a different color. I chose a vanilla buttercream to contrast with the brown of the fudgey chocolate icing.
As I circled around the cake, I discovered that I had imprinted backwards the very last letter of her name. So, that side isn't pictured. I just iced over it and pretended it didn't happen. Nobody really seemed to notice :)
As I circled around the cake, I discovered that I had imprinted backwards the very last letter of her name. So, that side isn't pictured. I just iced over it and pretended it didn't happen. Nobody really seemed to notice :)
Since the design was based upon the cake in the first picture, the next step was to make chocolate covered strawberries and stack them up on top and around the sides. I didn't do a cascade down the side because it would probably look silly with just one layer, and the cake needed to be transported in a tupperware box that wouldn't find side decorations like that.
I didn't have any space left in the fridge to give these guys a quick chill and harden the chocolate shell, so I left them on the counter overnight. They ended up being really juicy as a result, which wasn't a major problem. But if I did it again, I would definitely fit them in the fridge.


Thursday, March 6, 2014
Pretty pink cake!
I've got a request to make a wedding cake for some very good friends. To make sure that it goes smoothly, I wanted to practice making a tiered cake ahead of time.


 My boyfriend says it was my prettiest cake so far! I am quite happy with the final product, and so was she!
 Happy sweet 16 honey!
Luckily, my niece was turning 16 at the beginning of March, an occasion that warrants a beautiful tiered cake!
The party was Asian themed and I cooked a whole Chinese buffet worth of food (as a side note, I need more dishes!).
To match the theme with the cake, I decided to make cherry blossoms to decorate the cake. My niece asked for pink frosting and white cake with strawberry filling. I did this for the bigger, bottom cake.
I used a trick I found online to make the icing pink. Instead of adding water to the frosting, I added strawberry juice. This also puts flavor in the icing and makes it extra yummy!
For the top layer of the cake, I bought Matcha Green Tea powder and used it to make a green tea cake. I added some lemon curd to the frosting and then tinted it pink with coloring...you ready for this? Pink lemonade frosting!
Somehow I managed to get both of the frostings in a similar shade, plus the cherry blossoms. To bring in some variety, I used chocolate fudge icing for the tree branch and accent coloring.
I squeezed 16 roses onto the top of the cake.
Wednesday, February 12, 2014
Basket of Flowers Cake!
Look at this beautiful basket of flowers cake I made for one of my Wilton/Michael's class assignments!

It was banana cake and covered in a coffee buttercream. Yum!
Saturday, September 21, 2013
Fourth of Jul...CUPCAKES!
I *always* have to work on the 4th of July. I've been gone on the 4th of July pretty much every year for my entire life. When I was young, we went to summer camp on the week surrounding the 4th. As an adult, I got a job that ensured I would always be gone.
Except this year. Every once in a while, I score that day off. It happens so infrequently (seriously, I've been in Cincinnati on the 4th of July like 2x my entire life), that I have no idea what normal people even do on that day.
We got invited to a picnic, so we went! And I made cupcakes. From the only book I ever seem to cook out of. :)
 Cupcakes are great picnic food because you can grab them and run back off to a frisbee game, and the wrapper makes it so you don't have to get your hands dirty. Or it keeps your dirty hands off your cupcake. However you want to look at it.
I made Mississippi Mud Cupcakes with Marshmallow Frosting from Julie Richardson's Vintage Cakes book. It's a fudgy cupcake with pecans in it, topped with marshmallow frosting. I had to learn a new technique, which means that I made the frosting twice :)
 See those pecans there? This is me taking a picture and forgetting to toast them. Whoops! I think its a critical step for the tastiness of this recipe so I will make sure I do it next time.
Since I mostly make cakes and I didn't actually read the recipe all the way through before I started (see above re: not toasting pecans), I didn't realize I needed 2 muffin tins to bake these bad boys. Luckily my roommate has one. That'd be the one in the picture that looks like its only been used once.
 This batter made 2 dozen cupcakes, plus enough for nearly a dozen mini muffins. Those didn't last long. I gobbled them right up. These babies are delicious straight out of the oven, nice and warm. After they baked, I realized that I probably should have filled the muffin tins up higher. C'est La Vie.
 There are no pictures of me making the frosting. It was getting late and I was tired. It involved a candy thermometer and egg whites, and making the frosting a second time after I failed to successfully whip the egg whites. You live, you learn. At the very least, you have unfrosted delicious cupcakes.
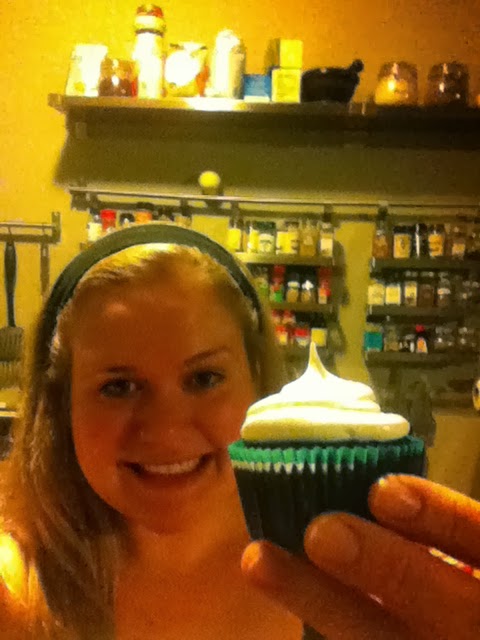
 Here is me with the finished product. At home first, then at the picnic.
 Noms. I bring noms.
Except this year. Every once in a while, I score that day off. It happens so infrequently (seriously, I've been in Cincinnati on the 4th of July like 2x my entire life), that I have no idea what normal people even do on that day.
We got invited to a picnic, so we went! And I made cupcakes. From the only book I ever seem to cook out of. :)

I made Mississippi Mud Cupcakes with Marshmallow Frosting from Julie Richardson's Vintage Cakes book. It's a fudgy cupcake with pecans in it, topped with marshmallow frosting. I had to learn a new technique, which means that I made the frosting twice :)

Since I mostly make cakes and I didn't actually read the recipe all the way through before I started (see above re: not toasting pecans), I didn't realize I needed 2 muffin tins to bake these bad boys. Luckily my roommate has one. That'd be the one in the picture that looks like its only been used once.



Subscribe to:
Posts (Atom)