Saturday, September 20, 2014

Cooking Classes at The Learning Kitchen

What should I do with my life?  I've been working on answering this question for a while, although I don't know that I'll ever fully answer it.  One of the first things I decided to do was to explore cooking a little more.  I do have a food blog, after all.  What if culinary school is where my path should lead?  How do I know if I enjoy receiving formal instruction in cooking?

I haven't had formal instruction in cooking since my days in the after school program at North Avondale Montessori.  I still remember how to wipe the cupcake pan after you fill it with batter, but before baking, so you have an easier time cleaning the pan when you are done!

There are a lot of local options for cooking classes, but the place that appealed to my taste buds the most was The Learning Kitchen in West Chester.  I chose them because of the following criteria:

-Each student gets their own cook top (hands on!)
-They offered a knife skills class (my area of most interest)
-Wide variety of options for other classes
-Fit my schedule
-Reasonable price (~$65+ typically, but they were running a Facebook special when I found them, so I think I paid something around $55 or so)

I took 3 classes:

Hone Your Knife Skills
Beef: Season, Sear, Saute
Stuffed and Filled

Here is a picture of me cheese-ing it up before class.  They provide you with an apron to wear, which is excellent as I was coming straight from work.


Of the 3 classes I took, Hone Your Knife Skills was by and far my favorite.  It was taught by one of the owners, Jennifer Vogel, who shared a story about how she found herself in culinary school after realizing that she was quite skilled at chopping vegetables.  In this class, they allowed us to try a number of different knife brands and sizes (20% discount if you buy on the day of your class!), and showed us how to properly hold and care for nice knives.  We then learned how to chop, dice, julienne, etc as we each prepared our own panzanilla bread salad.


I had a really good time at the first class and have really been enjoying showing my boyfriend how well I can chop onions ever since!  So I signed up for another class.  Beef!  I really love beef (and pork, let's be real here)!  We made New York Strip with Maple Mustard Glaze and Bourbon Sauce, Pan-Roasted Flat Iron Steak with Chevre Chive Sauce, and Creole Sliders with Pineapple Pepper Sauce.  This one was taught by one of the chef's that also teaches in the culinary program at Cincinnati State!  She also does some private chef work on the side, and I'd seen an instructional video that she made for how to spatchcock and roast a whole chicken.

At the Beef class I was delighted to discover that The Learning Kitchen sells wine by the glass/bottle.  Apparently they offer wine at all of the classes where the focus isn't on knife skills (for obvious reasons!!).  I had some nice red wine while we were cooking, and then with my meal as well.

This was a pretty big meal, and the license The Learning Kitchen has doesn't allow for you to take home your leftovers, so come hungry (or stash a super secret sandwich bag in your purse)!


The third class I took was called Stuffed and Filled.  We made Cheese and Sweet Pepper Stuffed Poblano Peppers, Pork Tenderloin with Prosciutto and Gouda, and Lemon Thyme Goat Cheese in Puff Pastry.  The instructor also made us a little dessert with the leftover Puff Pastry, by filling it with some Sweetened Mascarpone!

*I had a little trouble with my Poblano, so it wasn't quite stuffed and filled, but more like a platform for conveying a delicious blend of cheese and sweet pepper.  Hey, nobody's perfect!


What a delicious meal!  I thoroughly enjoyed learning to cook using the techniques taught in each of these classes.

Are these classes right for you?
The classes are very novice friendly, and they teach a lot of techniques that you can use for all kinds of kitchen tasks. As a more advanced cook, the class moved somewhat slowly at times, but I was happy to fill the gaps with a sip or two of wine as less experienced classmates got caught up.  There was a good mix of people like me who wanted to learn more cooking skills in general, people that had been gifted a class by a friend/relative, and people that were doing it as a fun activity to enjoy together.

The Learning Kitchen offers several date night classes where couples can prepare a meal together, which I think would make for an excellent date (sushi! Indian, shrimp and filet! homemade ravioli!), especially since they have wine. 

If you want to join me, the next class I want to take is The Five Master Skills, which are: using salt, heat management, simple sauces, tools, and proper ingredients.  Who's coming with?

So, what should I do with my life?  Cooking classes are fun.  I might even be interested in teaching them, and I'd certainly be willing to take a couple more.  What I learned from this experience is that I don't necessarily want to go to culinary school. 

*The opinions contained within this blog post are my own, I was not paid for this post.  I think The Learning Kitchen has offered some sort of discount if you share about them on your blog or rate them of Facebook etc, but I can't recall the details.

Friday, March 28, 2014

Chocolate Covered Strawberry Chocolate Cake

I'm very active on social media.  As I post more and more cake photos, friends and family have started sharing some viral cake photos and things from Pinterest with me.  One friend jokingly shared the cake pictured below and asked if I'd make it for her birthday.
That cake is big enough to serve several hundred people, at least.  But it sure is a beauty, isn't it!  And those strawberries are really quite tempting.

I decided to make a smaller  version of the cake (i.e. an 8" three layer cake) to help her celebrate her birthday.  I chose a classic chocolate cake recipe from one of my favorite cookbooks, and whipped up a batch of fudgey frosting, plus some vanilla buttercream to do some writing.

But, you see, I really suck at writing with frosting on cakes.  Seriously, I'm really bad at it.  But I need to get better, and practice makes perfect.

In the meantime, I bought the Cake Boss Letter and Alphabet Fondant Stamp Kit.  It looks fairly intuitive. You figure out why you want to say, and then you slide the letters into the holder and press it against the cake.


At least it would seem intuitive.

No, that's not a mirrored picture.  I'm just that discombobulated.  Eventually I figured out how to fix it up though.  Glad it was just on frosting and not fondant or I would have had to pull off the fondant and start again!

Once I figured out the right direction for the stamps, I just filled in the indentation with some frosting in a different color.  I chose a vanilla buttercream to contrast with the brown of the fudgey chocolate icing.

As I circled around the cake, I discovered that I had imprinted backwards the very last letter of her name.  So, that side isn't pictured.  I just iced over it and pretended it didn't happen.  Nobody really seemed to notice :)

Since the design was based upon the cake in the first picture, the next step was to make chocolate covered strawberries and stack them up on top  and around the sides.  I didn't do a cascade down the side because it would probably look silly with just one layer, and the cake needed to be transported in a tupperware box that wouldn't find side decorations like that. 
These were so delicious that I made a few extra in case some of them 'went missing.'
I didn't have any space left in the fridge to give these guys a quick chill and harden the chocolate shell, so I left them on the counter overnight.  They ended up being really juicy as a result, which wasn't a major problem.  But if I did it again, I would definitely fit them in the fridge.

The cake was very well received, and I even got a second thank you message a full week later!  
Happy Birthday to my friend!

Thursday, March 6, 2014

Pretty pink cake!

I've got a request to make a wedding cake for some very good friends. To make sure that it goes smoothly, I wanted to practice making a tiered cake ahead of time.

Luckily, my niece was turning 16 at the beginning of March, an occasion that warrants a beautiful tiered cake!

The party was Asian themed and I cooked a whole Chinese buffet worth of food (as a side note, I need more dishes!).

To match the theme with the cake, I decided to make cherry blossoms to decorate the cake.  My niece asked for pink frosting and white cake with strawberry filling.  I did this for the bigger, bottom cake.


I used a trick I found online to make the icing pink.  Instead of adding water to the frosting, I added strawberry juice.  This also puts flavor in the icing and makes it extra yummy!

For the top layer of the cake, I bought Matcha Green Tea powder and used it to make a green tea cake.  I added some lemon curd to the frosting and then tinted it pink with coloring...you ready for this?  Pink lemonade frosting!

Somehow I managed to get both of the frostings in a similar shade, plus the cherry blossoms.  To bring in some variety, I used chocolate fudge icing for the tree branch and accent coloring.

I squeezed 16 roses onto the top of the cake.
My boyfriend says it was my prettiest cake so far!  I am quite happy with the final product, and so was she!
Happy sweet 16 honey!

Wednesday, February 12, 2014

Basket of Flowers Cake!

Look at this beautiful basket of flowers cake I made for one of my Wilton/Michael's class assignments!


It was banana cake and covered in a coffee buttercream.  Yum!

Saturday, September 21, 2013

Fourth of Jul...CUPCAKES!

I *always* have to work on the 4th of July.  I've been gone on the 4th of July pretty much every year for my entire life.  When I was young, we went to summer camp on the week surrounding the 4th.  As an adult, I got a job that ensured I would always be gone.

Except this year.  Every once in a while, I score that day off.  It happens so infrequently (seriously, I've been in Cincinnati on the 4th of July like 2x my entire life), that I have no idea what normal people even do on that day.

We got invited to a picnic, so we went!  And I made cupcakes.  From the only book I ever seem to cook out of.  :)

 Cupcakes are great picnic food because you can grab them and run back off to a frisbee game, and the wrapper makes it so you don't have to get your hands dirty.  Or it keeps your dirty hands off your cupcake.  However you want to look at it.

I made Mississippi Mud Cupcakes with Marshmallow Frosting from Julie Richardson's Vintage Cakes book.  It's a fudgy cupcake with pecans in it, topped with marshmallow frosting.  I had to learn a new technique, which means that I made the frosting twice :)
See those pecans there?  This is me taking a picture and forgetting to toast them.  Whoops!  I think its a critical step for the tastiness of this recipe so I will make sure I do it next time. 

Since I mostly make cakes and I didn't actually read the recipe all the way through before I started (see above re: not toasting pecans), I didn't realize I needed 2 muffin tins to bake these bad boys.  Luckily my roommate has one.  That'd be the one in the picture that looks like its only been used once.
This batter made 2 dozen cupcakes, plus enough for nearly a dozen mini muffins.  Those didn't last long.  I gobbled them right up.  These babies are delicious straight out of the oven, nice and warm.  After they baked, I realized that I probably should have filled the muffin tins up higher. C'est La Vie.
There are no pictures of me making the frosting.  It was getting late and I was tired.  It involved a candy thermometer and egg whites, and making the frosting a second time after I failed to successfully whip the egg whites.  You live, you learn.  At the very least, you have unfrosted delicious cupcakes. 
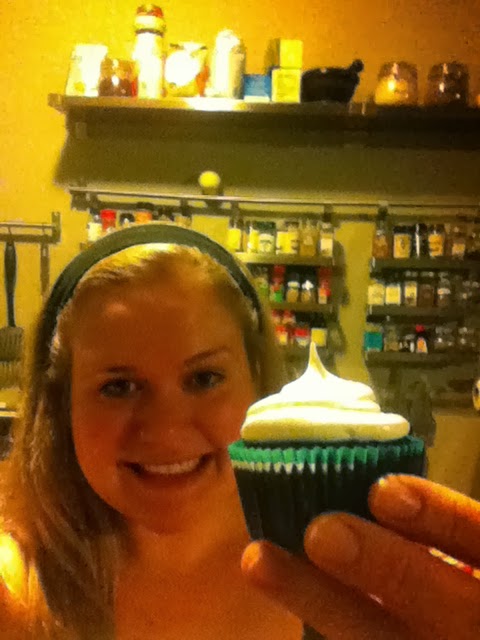
Here is me with the finished product.  At home first, then at the picnic.
Noms.  I bring noms.

Friday, September 20, 2013

The Pink Cake

As I mentioned in my last post, I've been taking a cake decorating class through Michael's.  It's the Wilton method.  I've been making a WHOLE LOT of cakes over the past few months.  Its been a couple busy baking months for my oven!

I wanted a super delicious cake to take to a Labor Day Fireworks party, so I turned to my trusty cookbook, Vintage Cakes by Julie Richardson.   There is a definite chance that I will cook every recipe from this book within a years time...everything from the book is just so delicious!  For a girl that finds most of her recipes on the internet, this is really saying something.  I've even made one of the recipes twice!  Honey Bee Cake, I'm looking at you!

The Pink Cake is a classic party cake.  It's chocolate layer cake with raspberry buttercream.  It is absolutely heavenly. 

This picture cracks me up because I'm wearing the same outfit I had on for Pilates earlier that day.  Something just not right about making desserts while wearing your gym clothes!
Doesn't this look like I'm squeezing blood out of a heart? eewww!
I had a bit of trouble with the raspberries.  I used the frozen kind, as recommended, and I knew I didn't want the seeds in the frosting, so I layered some cheesecloth over a metal strainer.  This unfortunately kept all of the berry bits out with the seeds, so all I had was the liquid.  I wasn't willing to pick through the remnants to get the seeds out, so only the juice made it into the frosting instead of actual raspberry puree.  When I combined it with the buttercream, it looked like brains!
Cutting out the puree part of the raspberries made the consistency much too liquidy.  I added a bunch of powdered sugar to fix it up.  Quite delicious.  I can think of quite a few things I would slather this frosting on and gobble up!
You like my cake frosting tip and featherweight bag?  Remarkably quicker and easier than the way I used to frost my cakes.  And I think my frosting sits a lot more evenly now too.  I need to get one of those fancy cake turntables.

Speaking of wish lists, I own exactly one apron.  I got in on clearance after Halloween one year and figured I would wear it once a year while prepping for our annual Halloween bash.  Except its my only apron, so I wear it all the time.  I'm comfortable with this level of dorkiness.

After I got the cake iced, it was time to whip out some ribbon roses from my cake decorating class!
I made the yellow decorating icing a tad too thick, so I'm squeezing the bag really hard in this picture!

Silly pose with the completed cake..I swear, one of these days I'm going to drop one of these and be horrified.  I'll probably sit down and eat it off my floor while I cry.
Here's the inside.
mmmmmmmmmm
Need a good party cake?  I definitely recommend this one.  The recipe is available on Epicurious, though I really do think you should buy this lady's book.

Thursday, August 22, 2013

Cherry Chip Cake

Guess who dropped out of grad school and signed up for a cake decorating class instead?  This girl.  No joke.

The cake I'm sharing today is the Cherry Chip Cake, another delight from Vintage Cakes by Julie Richardson.  This was actually the first cake I made from the book, and was right before the busiest time period I've ever had in my entire life.  I'm glad I got to bake a cake first :)
So, cherry chip cake.  I've always wondered why people choose eclectic flavors for things.  It would just never dawn on me that I should make a non-standard cake flavor.   I mean, cherry is totally a non-standard cake flavor, right?
This is probably the first time I've ever purchased cake flour, if you can believe that.
This cake was also the first time I ever used my food scale to weigh cake ingredients.  I'm hooked on that now, because it seems so smart!  I even weighed the batter in each pan to get even layers!  I had a little panic when I realized I didn't have 3 8" cake pans.  Luckily my springform was the right size.  Accounted for in the weighing process, of course!!
The frosting for the cake was Cherry Buttercream, with a little bit of Kirschwasser, a colorless cherry brandy, mixed in.  The recipe also calls for dried cherries to be reconsituted and mixed in to a basic buttercream recipe.  I was happy that my boyfriend was able to find a tiny bottle so we don't have it sitting on the shelf for years and years.
I thought that the icing was a really gross brown tint from adding in the dried and reconstituted cherries.  So I added some red food coloring to make the cake pink.  Here are the before and after colors.  Pink was a good call, right?

Not that it needed any more awesomeness, but to add some extra awesome in there anyway, each cake layer is topped with chocolate ganache.  I didn't let it cool enough, which was a bit of a problem when I tried to put frosting between the layers.  Luckily it didn't seem to matter too much.  I worked it out.
Since this was prior to my cake decorating class, I wasn't schooled in the lessons of cake leveling, nor did I own a cake leveler.  As evidenced here!
Actually, the leveling doesn't look too bad with the icing on there!
One of my baking traditions is to take a picture of myself making a 'bite face' with my cake.  This cake led to the most epic, most amazing bite face ever. 
No comment...