Monday, December 5, 2011

Lime Mousse Cake

Every once in a while, I make a recipe that is so delightfully tasty, I don't want to eat anything else.  I hosted a few friends for dinner on Black Friday and I made a Lime Mousse Cake.  The cake was more cheesecake than mousse, but it was absolutely to die for.  I definitely recommend making this.  My friends were nice enough to wait while I posed for a photo, and even to take the picture for me!
Here is a photo of the ingredients, prior to assembly:
For the crust, use a food processor to crumble some ginger snap cookies.  Not a traditional graham cracker crust, but a delicious variation.  The recipe calls for butter to hold together the crumbs,  You could probably use something else with less fat/calories if you wanted to lighten up the recipe.


Mix together lots of delicious ingredients like cream cheese, white chocolate, and lime zest.  You'll eventually add some weird stuff too, like unflavored gelatin and granulated sugar.


 In another bowl, make some whipped cream.  Then mix the two together to complete the filling.  This cake will hold itself together after an overnight in the fridge.  No baking required.


Smooth the top with a spatula, then use a knife to make a sweet note to your honey.


The rough edges are how you can tell it's home made.  I love my 'non-uniform' lime cheesecake with funny edges.

I served it with a few blackberries for garnish.  There are a bunch of different ways to jazz up this dessert, but it really doesn't need it.  It stands quite well on its own.

Do yourself a favor and don't count the calories in the recipe for this cheesecake.  Make it up for a party where there will be lots of people to prevent leftovers.  And for goodness sake, make sure you taste the batter.  ;)

Wednesday, November 23, 2011

Autumn Chicken Roulade

Have you ever made a roulade?  It sounds fancy, but it's really just a French word for a "Roll-Up."  You've probably had a pumpkin roll, which is a form of roulade.

I made a Chicken Roulade recipe from Clean Eating Magazine.  It was delicious.

I made two versions.  One with butternut squash for me; the other with sweet potato for my honey, who doesn't like squash.
I'd like to tell you that mine (with squash) was infinitely better than his (with sweet potato), but I didn't taste the sweet potato version and I have no idea if it was better or not.

So, first you chop up the squash or sweet potato and some shallots into small pieces.  Then you saute them into they are close to soft, but not quite soft.  You are going to bake them a little bit, so you don't want them too mushy.

While they saute, pound out some chicken breasts until they are thin.  I used 4 pieces of chicken so that we would have some left for lunch the following day.
Then you mix the mostly cooked vegetables with a little goat cheese, some bread crumbs, and some spices.  The recipe called for sage, but I didn't have any.  I used a rosemary chicken rub instead, and it was a good match.  Throw in a little salt and pepper.
You are supposed to use a piece of lean ham to wrap up the roulade, but I misread the label on the product I picked up at Whole Foods and ended up with some form of bacon instead.  Luckily, it only had 50 calories a slice, so I was still able to make do.
Now you are ready to roll up the roulades.  Start by laying down the bacon/ham, then topping it with a piece of pounded chicken.

Then you add on the squash/potato filling, and roll it up.  Firmly secure with toothpicks.  Don't forget where you put them!
Bake the roulades in the oven until the chicken is cooked.  Don't leave them in there too long...the chicken will easily overcook because it is so thin.  You could probably use a meat thermometer, but I just cut one open to see if the meat was still pink.
Make sure you pull out the toothpicks before serving.  The meat will hold itself together after cooking, so they won't be needed.

I served it with some Asian style stir fry veggies and a little quinoa.  That was mostly due to lack of planning for a side dish.  I was so focused on making the entree that I didn't put any thought into what to go with it.  Something seasonal would probably go well with this, like some Brussels Sprouts.
Sounds like I did it wrong, what with the vegetable side dish mis-match and all.  Guess I'll have to make it again!

Thursday, November 10, 2011

Nanny's Apple Cider

My grandmother is a great cook.  Several of my favorite recipes are also family favorites from her kitchen.  Now that the cold weather is upon us, it's time for one of her classic recipes:  Apple Cider.  This is a really simple recipe.  It smells delicious, tastes delicious, and is downright...delicious.

My grandmother says that she believes this cider recipe was posted in the Cleveland Plain Dealer years ago.  She moved here from Cleveland over 30 years ago, so trust me when I tell you that this recipe has stood the test of time.
Did you notice the remnants of my cool Halloween manicure in that picture?  The apple cider was made for our Halloween party, and like the pumpkin bread, is unfortunately long gone.
In case you can't read the image from the picture above, here are the ingredients:

Nanny's Apple Cider
 
1 gallon Apple Cider
1 stick of Cinnamon
2 teaspoons Whole Allspice
1 teaspoon Cardamom Seeds
1/2 teaspoon Nutmeg
3 Orange Slices, each studded with 5 Whole Cloves

You can go two ways with the other spices.  One way is to dump them all in the cider and then strain it before serving.  I think that's a little too time and labor intensive, so I usually make a 'homemade tea bag' with a paper towel and float it in the cider.  One day I will get really fancy and buy a tea ball...

After the spices have been added, the cider should simmer for 30 minutes with the orange slices floating on the top. I'm rather fond of spearing the orange slice with the sticks of whole cinnamon.  I think it looks pretty when you float them in the apple cider.

My mom recommends preparing the cider a day in advance because she thinks its better after its been reheated.  So, if you've got the time, you should definitely do it that way.  If not?  Still delicious.

Wednesday, November 9, 2011

Pumpkin Bread

Do you like fall?  What about all the tasty foods that come along with the changing of the seasons?

I set out to make some pumpkin bread recently and am amazed at the delicious recipe I found.  Even more remarkable is that this recipe is designed to be used for a Pumpkin Bread Pudding (with Spicy Caramel Apple Sauce, no less).  I suppose if you are going to make a bread pudding, you should make sure that the bread is extra delicious!

Disclaimer:  My pumpkin bread didn't last long enough to become bread pudding, so you'll have to try that one yourself, if you've got enough willpower.  Or, enough pumpkin to make a few loaves.
The ingredients in the recipe are simple enough:
Fairly standard, yes?  Notice that the pumpkin is just standard pumpkin, not the kind that's ready to be poured into a pie.  I have an astonishing number of spices on my spice rack, so I'm always thankful to use them in a recipe.

First you mix up the wet ingredients with a stand mixer:
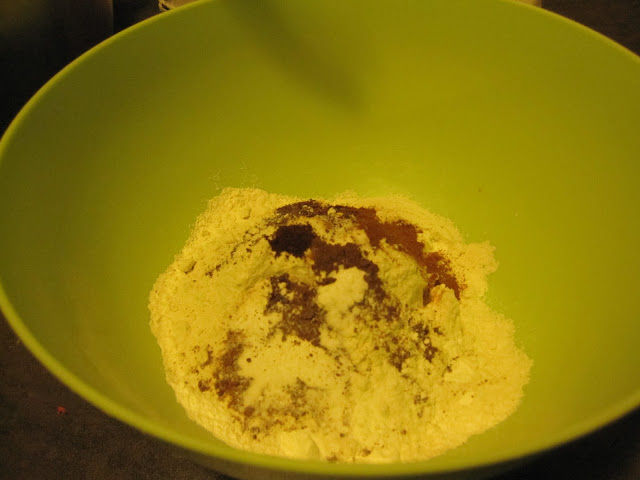
And the dry ones in a separate bowl.  I know this is simple, but I totally got it wrong the other day ;)
Then you mix the dry ingredients into the wet ones until you have delicious pumpkin bread batter ready to pop into the oven.

I enjoyed this recipe so much that after I sampled it, I immediately made a second loaf.  We shared this at our halloween party, and I am thinking it will make another appearance at Thanksgiving.  Yum yum!!

Monday, October 31, 2011

Halloween at Queen City Yam

I didn't have time to get all my fun Halloween posts published before the holiday was over.  David and I went to several haunted activities and I had too much interesting stuff to write about and not enough time!

Here is my Halloween wrap up post on pumpkin carving, seed toasting, and our costumes.

This is my pumpkin.  And, a view of my awesome IKEA spice rack :)  It's actually three spice racks combined and I have absolutely no more room on there, so I hope I don't need any new spices anytime soon!

I was too busy carving to take any action photos, so here is the finished product:
I love that his mouth is asymmetrical.  I think it makes it extra spooky.  The bat hanging in the background doesn't hurt.  ;)
After I was done with the carving, I wanted to toast up the seeds for a late night snack. 
First, I separated the seeds from the goo.
Then I spread them out on a cookie sheet (in a single layer, not like the pile in my photo)
Then I added seasoning.  I wanted a sweet but salty and spicy pumpkin seed, so I mixed in a few different ingredients.  Brown sugar, kosher salt, Dee Felice Jazzed Hot Sauce, and Worcestershire Sauce.  Plus a little butter and garlic.
When the seeds were roasting, my kitchen smelled like a summer time bbq.  Until the seasoning started to burn off on the foil.
I think I was lucky that the seeds themselves didn't burn, because I definitely had the oven on the wrong temperature.
Still, the seeds were quite yummy.

For Halloween itself, we dressed up as Batman and Poison Ivy. 
I hope you had a Happy Halloween!

Wednesday, October 19, 2011

Currant and Spice Oatmeal Cookies

I don't know what it's like where you live, but it is starting to get downright cold here in Cincinnati.  I walked home from class tonight in a very cold rain.  Nothing brings out the baker and soup maker in me more then a cold spell.

Last weekend, I wanted to make some cookies to take to a family gathering.  I looked around on Epicurious until I found something I could make with the ingredients I had on hand.

Then I found it.  Currant and Spice Oatmeal Cookies.

Currants are one of those things I buy from time to time for a recipe that never gets made a second time.  And then I have the extra box on hand for lord knows how long.  Don't worry, I checked the expiration date on it before I used them :)  See, you can almost see the date in this picture.

The recipe wanted you to rehydrate the currants using beaten eggs mixed with vanilla extract.  I gave it a shot, but I'm pretty sure it just turned them into fatter currants...I'm not sure it was a crucial step to cookie success.
A few dry currants managed to sneak into the mix without being rehydrated, but it still turned out just fine.
While the currants were soaking, I beat together the brown sugar and butter.  This would have been much easier if I'd used the stand that came with the mixer.  I was really fighting with it.
Here is where I almost ruined the cookies.  It looks finished, right?
I was so convinced that it was finished that I started to put away ingredients while the oven finished pre-heating.  Then I realized something was missing!
You can't have Currant and Spice OATMEAL Cookies without the oatmeal!  I was so glad that I caught my mistake before it was too late. Here is the mix with the oatmeal stirred in.
We had to depart for the Newport is Haunted Tour (more on that later!) right after the cookies were done, so I didn't get a picture until later.  I quickly realized my camera was still on the 'sepia' toned setting from the tour, and decided to have a little fun with it.  Here is a weird picture of me with a spooky Halloween owl!
And, in the spirit of weird pictures, here is a picture that shows off my Halloween manicure, with the cookie.
These cookies were delicious.  They got rave reviews from everyone that ate them.  I will definitely be saving this recipe to make again.  This recipe would very easily lend itself to modification with different fruits or nuts or chocolate chips.  Let me know if you try it out!

Monday, October 17, 2011

King's Island Halloween Haunt

I love going to King's Island……when there aren't long lines or big crowds.  I love to ride the roller coasters and eat funnel cake and just plain enjoy myself.  However, I tend to avoid it during summer due to the heat and what I assume are massive crowds.  Waiting in line for 2 hours just doesn't sound fun to me.

Long lines can mostly be avoided if you visit during King’s Island Halloween Haunt.  They have most of the roller coasters and rides open, plus, they feature multiple haunted houses and ghouls circulating all over the park.

As we walked through the metal detectors and waited to get our admission tickets scanned, ghouls of all shapes and sizes surrounded us and began scaring the daylights out of the crowd.  We went on opening night and these scary folks were ready to go!

While there were a lot of people waiting to get in when the park opened, there were not long lines for most of the rides.  We were able to walk right on to several of the rides and many others only ran through a time or two before it was our turn.  Some of the newer rides had lines, but we only waited about 30 minutes for them.  Towards the beginning and end of the evening we experienced the shortest wait times.

I’ll divide the rest of my review into four sections: Haunts, Rides, Attractions, and Food.

Haunts:

Mysteria is described on King’s Islands web site as the following:
“Get ready to enter a new dimension where nothing is as it appears.  In the world of Mysteria, your senses will never be the same!  Enter at your own peril!”

Mysteria was by far the strangest haunted house I’ve ever gone through.  The actors were dressed in full body spandex suits, face and all.  It was indoors with a chain link maze from one end to the other.   The actors made weird movements and peered at you through their costumes but made little to no sounds.  As it would be difficult to see all the features at King’s Island during their open hours, I would recommend that you not add Mysteria to your ‘Must See’ list.

My favorite haunt by far was the “Tombstone Terror-tory.”  This incorporates the train that takes you between the water park area and the roller coasters during the normal park season.

“Covered bridges and foggy terrain disguise the evil that lurks in every direction as you travel aboard a midnight train.  But don’t be alarmed.  We guarantee you’ll make it to your final destination!”

According to a few King’s Island enthusiast friends of mine, “The train gets hijacked every year!”  However, I’d never gone on it and it was a complete surprise to me when the train stopped in the dark scary woods.  Then, hijacking ghosts boarded the train and ordered everybody off.  My boyfriend wasn’t moving fast enough, so I literally jumped over him in his seat to get off the train.

After they scared us off the train, we followed a wooden bridge trail back to the main park.  Of course there were monsters around every bend, which was to be expected.  However, a couple of them still managed to scare me quite well.

We didn’t get to go through many of the haunted houses because I was more interested in the rides.  If we have a chance to go back this year, I’d really like to check out Urgent Scare and Holiday Horror.

Rides:

My boyfriend says that I am brave until I am on a roller coaster.  I tend to do a decent bit of screaming.  We rode a lot of the rides and it was very much fun.

Windseeker is one of the newer rides at King’s Island.  It is a classic swing in a circle ride, but it goes very high up in the air and twirls you around.  It offered a wonderful view of the park and was quite romantic.  Don’t expect to get a smooch on this ride, however, because you are very securely belted in.  Just hold hands instead.

The Beast is my favorite if I find myself at King’s Island after night falls.  It goes into a dark corner of the park and is absolutely terrifying.  I screamed so loud on The Beast that the people behind us were laughing.  Behind us?  Yes.  The line for the ride was so short, we waited a few extra minutes to sit in the very front seat on The Beast.  Well worth it!

Firehawk makes you feel like superman.  You end up going through this ride on your belly.  It was quite fun, but was the first coaster I’ve ever ridden while wearing glasses (I was preparing to get tested for LASIK), and I was terrified they would fall off!

Attractions:

My boyfriend loves wrestling and was excited to hear that King’s Island was hosting the Half Pint Brawlers, a wrestling troupe made up of little people.

This was by far one of the worst shows I’ve ever seen.  The fellow they picked to MC the pre-show droned on and on like an automatic tape player and was completely unable to engage the audience.
I was horrified when the brawlers walked into the ring with staple guns and proceeded to request dollar bills from the audience to staple to each other.

The MC kept saying, “Are you ready to see a midget bleed?”  I was not prepared for that, especially if the bleeding was going to be initiated with a staple gun instead of a wrestling match.  Call me old fashioned…
We didn’t stay at Half Pint Brawlers show for very long and I would be surprised if King’s Island invites these fellows back for another year.

Food:

We got a couple Five Guys Burgers and ate in the car on our way to King’s Island.  This was a cost effective idea and served us well.  We had a funnel cake as a late night snack, and then got some apple cider and hot chocolate at their Starbucks to drink on our way home.  I needed a hot drink to soothe my throat after all the screaming I did.

Summary:

We had an amazing time at King’s Island and I can’t wait to go back next Halloween.  We got there before it opened and stayed until the park closed and they played a recording that said, “Get out!”  You should do your best to make it there for Halloween Haunt.


Tuesday, October 11, 2011

Queen City is Haunted Walking Tour

My boyfriend recently surprised me with tickets to the Queen City is Haunted Walking Tour, which he scored through Groupon.  The tour departs from Cincy Haus in the gateway district downtown and is run by American Legacy Tours. 

"The Queen City is Haunted Walking Tour uncovers disturbing tales buried deep within Cincinnati’s storied past. Follow your expert guides to discover stories of ghastly murders and gruesome deaths. Linger with us in the halls of an archaic building teeming with paranormal activity, and walk the grounds where human remains have been recently unearthed. Learn about Cincinnati's Murder College, the ghosts of Music Hall, and the Tri-State's most prolific killer. Join us on Fridays and Saturdays in October to experience the chills and thrills of one of America’s most haunted cities."

Before the tour started, we stopped in Venice on Vine for a quick bite to eat.  I've been wanting to try it for a while and was happy we were finally getting the opportunity.  We split a delicious sausage hoagy.  I'm not sure if the level of deliciousness was warranted or if my taste buds were just happy to finally be fed!  We will make a return trip in the future and compare for a full review.

After we checked in at Cincy Haus, the tour headed a few doors down for a quick introduction and overview of what to expect during the tour.  Here is a photo showing you how many people were in the tour group:
I am guessing that they usually have much smaller groups and that this one was large because of the Groupon.  I was worried that I wouldn't be able to hear the guide's speaking, but they had absolutely no problem speaking loud enough for everyone to hear.

We made a number of stops to hear scary tales.  I didn't include all of the pictures here because you need a reason to go on the tour yourself!  Here are a few of my favorites.

The photo below was taken outside Memorial Hall, where the wreath that lay on Abraham Lincoln's grave is displayed.  One of the tour guides had a personal ghostly experience inside Memorial Hall and eagerly told us all about it.
My favorite stop on the tour was an unexpected surprise: 1313 Vine Street, the old Warehouse night club.  I frequented The Warehouse when I was younger.  Here is a description I found from a Cincinnati Enquirer article written in 2001, which sums up the atmosphere pretty well:

"An underground dance club to satisfy the angst-filled souls of the inner city, The Warehouse resounds with techno beats.  Music ranges from retro alternative to industrial, paired with throbbing dark surroundings."
In the photo above, you are in the front of the club looking back.  The bathrooms were through the doorway to your left.  If you went straight back from where I was standing, the rest of the area was a dance floor, dj booth, and bar.

I'd never seen the upstairs.  I'd heard rumors about the staff keeping a mattress up there for nights when their shifts ran too late to go home, but I never wandered up there myself.  I wish I had.  Look at this!
According to the tour guides, this is the only remaining indoor bier garten in the city.  The painting on the wall panels is not original.  The area was used for a movie filmed here in the 1980's, which I believe was called A Rage in Harlem.

 Notice the inexplicable circles of light in the photo?  These are called 'orbs' and are considered by some to be glimpses into the paranormal.  Others consider them to be particles of dust in the air caught by the flash of the camera.  I'm not sure what to think, as I tend to find them in spooky areas that are coincidentally quite dusty.

As a side note.  This was a night time haunted tour, which makes the photos dark.  If you're interested in seeing pictures of this area in the daytime in additional detail, click here and look through the photos.  They are pretty cool.

Here is another photograph in the second floor where you see a larger orb.


The photograph below is looking up at the ceiling over the bier garten, where there are many orbs.


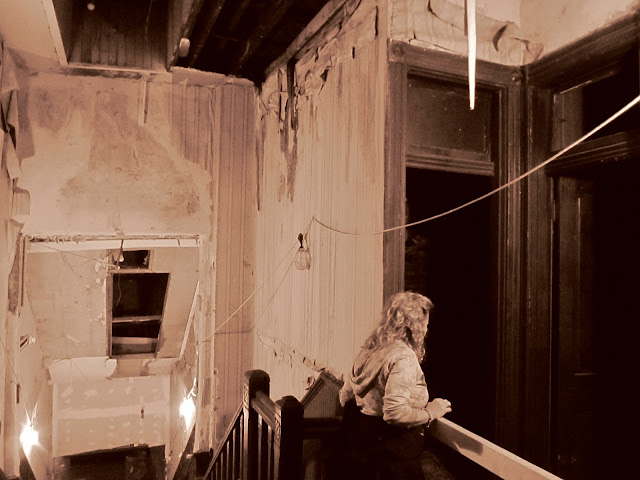
My favorite shot of the night was done in Sepia.  This woman is standing on the main stairway that leads from the first floor into the second floor.  You can see that the building is in pretty rough shape.  The door on the left is a closet.  I don't recall what was is in the other door. 
We had a great time on the tour and are planning to head back before the month is over to check out the Newport is Haunted Tour, which features talk of a decapitation!  Can't wait!

Monday, September 19, 2011

Acorn Squash and Black Bean Empanadas

Be jealous.  Be very jealous.

I made Acorn Squash and Black Bean Empanadas from Veganomicon.  They are amazing.

There is nothing that announces the Fall season better than the re-introduction of delicious squash in my eating routine.

You know what I like most about this dish?  The results look homemade.  I'm really quite proud of my misshapen empanadas.
Here are the ingredients I used:
I mixed this dough the dainty way, using two knives to blend it together.  I wouldn't use that method again, however.  It wasn't efficient enough for my tastes.
Once its mixed up, roll it up into a ball then get your rolling pin ready to go.
I tried to be really exact with my measurements of the dough.  It was my first time trying to make empanadas and I think next time I will roll the dough thinner.  In fact, that's my new rule of thumb for rolling dough...just go ahead and make it thinner then you think is necessary.
Here is a picture of the yummy filling getting cooked down.  Maple syrup, red onions, acorn squash, black beans, a few spices.
While the flavors in the filling were melding together, I cut squares from the dough and rolled them out a little larger.
Then it was time to fill them up!
Rinse and repeat until you run out of filling or dough.  Or both at the same time if you're really talented.  The empanada filling was delicious all on its own, so it was served as a side dish a few nights after I made these.
I didn't quite follow the directions in the book for how to fold the empanadas to make them look nicey nice.  So mine definitely look homemade.  But, that's the charm, eh?!

Time to dig in!